Due to the popularity of the Linksys/Cisco PAP2 and PAP2T adapters, there has been an abundance of counterfeit ATAs lately, available mostly through sites like eBay, Craigslist or Kijiji but also some online merchants.
While the counterfeit devices work identically to the genuine ones, experience has shown that they tend to fail much quicker than the genuine devices, most of the time within the first few months of use. The typical behaviour of a failed device is that it doesn't boot, doesn't respond to web access and phone commands and the power LED stays red (orange in the case of PAP2T).
Most of these are coming from sellers in China / Hong Kong but some local sellers also import them in bulk and retail them locally.
This short guide will show a few simple steps to check if your PAP2(T) is genuine.
!!!! BUY VOIP DEVICES !!!!!
Start by examining the label on the back of the unit. Find the serial number and MAC address. The serial number and MAC address should be printed in barcode as well as readable characters. If only the barcode is printed, like the picture on the left, the ATA is a counterfeit. If the label has the MAC address and serial number both in barcode and readable characters, like the picture on the right, proceed to the next step.
Take the first 6 digits of the MAC address (001217 in the example pictured), enter them in the next field and click Search.
In the page that opens check the value for Vendor. It should say Cisco, Linksys or Sipura. If it shows a different company, the ATA is a counterfeit.
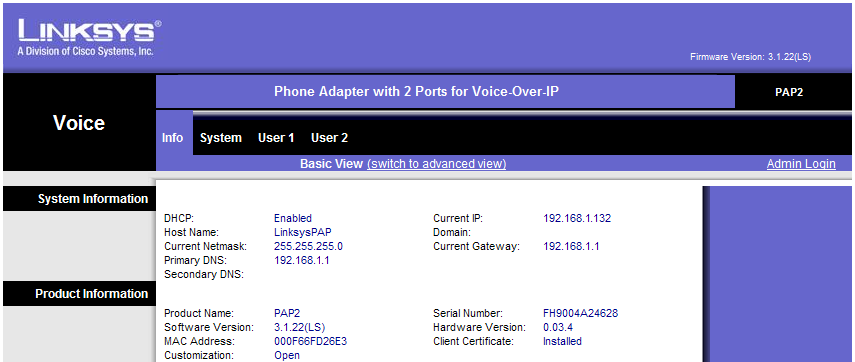
Last step is to verify if the MAC address and Serial number printed on the label match the ones visible in the adapter's configuration page. With the adapter connected to your network and a phone connected to the adapter, pick up the phone and dial ****110#.
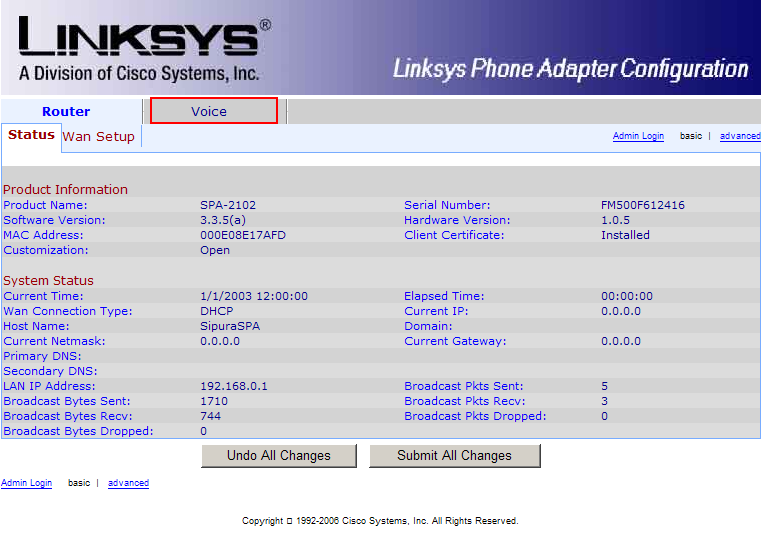
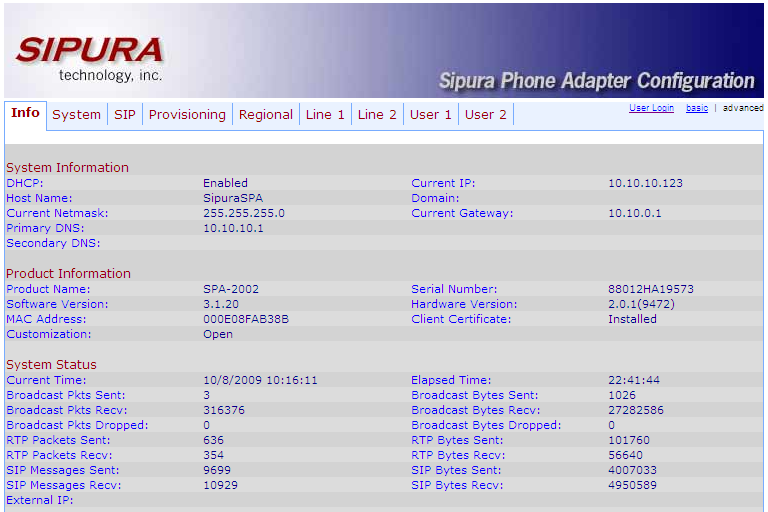
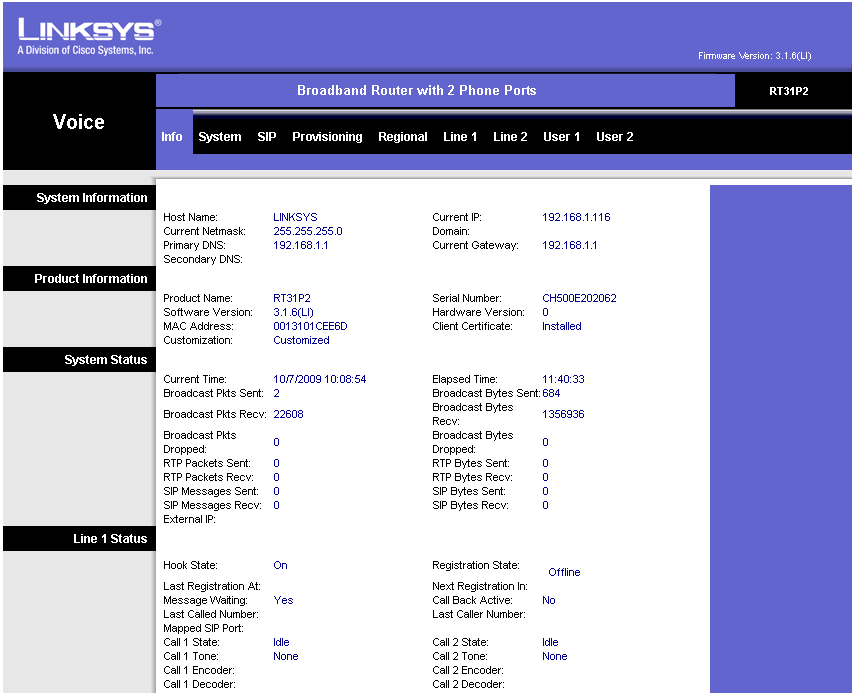
The adapter will read back (with voice) its IP address. Open a browser and enter that IP address. This will bring up the Info page of the ATA, similar to the one below.
Compare the MAC and Serial number printed on the back of the unit with the ones from the Info page. If they match, your adapter is most likely genuine. If they don't, your adapter is counterfeit.
Also, you should check the appearance of the packaging. There are three types of boxes (pictured below) that Linksys ATAs are shipped in. The design on the left has been used by Linksys only for the original PAP2 adapters. If a PAP2T comes in a box like that, it is most likely a fake. An original PAP2T may come in either one of the boxes depicted on the right (the top one is the retail box, while the bottom one is typical for ATAs sold through a VoIP company).

You can also check the physical appearance of the AC adapter that came with the ATA. Most sellers of counterfeit PAP2(T)s do not include genuine AC adapters with their devices. The genuine power adapters will look like the ones below. The lack of an adapter that looks like this does not necessarily mean that the PAP2(T) is not genuine if the seller indicates that it's a used ATA and the original AC adapter has failed or was lost and was replaced with a generic one. However, any PAP2(T) that is claimed to be brand new should come with an AC adapter like this.
!!!! BUY VOIP DEVICES !!!!!
.